------------------------------------------------------------------------------------------------------------------------------------------------------------------------------------------------------------------------
Have you ever shot a roll of film and double exposed a photo? You get the roll back from the printer and one (or ALL!) of your photos have 2 photographs layered on top of each other? Usually it ruins the roll, but once in awhile, you can come up with something fun. I remember once I ended up with a cheerleading photo with spraying water all behind my back :) Anyway, photographers can double expose purposely, but it was a lot more difficult with film. With digital tools, the art of double exposing is much easier and you can simply layer textures onto your photos.
Textures can be urban edgy or classically romantic, simple or detailed, and they are SO easy to use. Trust me, they really are!! They can take a ho-hum photo and give it more interest, more depth, a little more soul. See this photo of a marigold? It is fine...interesting composition, exposed well, sharp and clear, the right dof....but it is just fine.

Add a little bit of texture and that bombastic gold chills out a bit and the background gets a pebbly "textured" look to it.
 |
| ALLENAIM TEXTURE moon rocks |
Take this photo which is pretty gorgeous in its own right. You could certainly print it as is, but how about a little romantic texture?

The photo retains the color intensity, but gains an added dimension.
 |
| ALLENAIM TEXTURE cement |
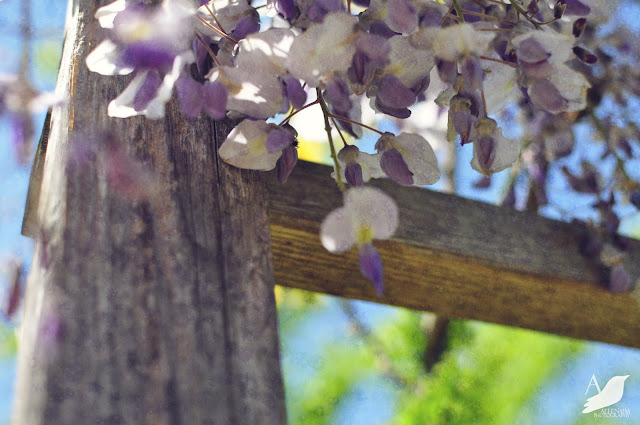
Do you see the subtle texture on this photo? It is barely there, but gives the wood a bit more depth and the background and flowers take on an almost watercolor look.

 |
| original photo |
So you barely feel literate in basic photoshop and feel like this might be too complicated for you to try? Well, at least attempt it. I'm your cheerleader here...YOU. CAN. DO. IT! You might be surprised at how very easy it is!
To make the texture application easier, download this FREE TEXTURE ACTION from MCP ACTIONS.
Then, you can download these FREE TEXTURES from me below!
Simply right click and download these photos to try layering on your own photos! Go ahead - right click! I'm giving you permission! Just don't sell them!
I have given a few tips in the captions of each texture, but the main thing to remember is to ADJUST THE OPACITY to make the texture layer (photo) more or less "see through". If you are a beginner start with cement and then try out the more complicated textures!
ALLENAIM TEXTURE cement
 |
| This is one of the easiest types of textures to use. It simply adds a tiny bit of texture, and a nice grey tone to your photo. The little "bits" and blurry grass lines add interest. |
ALLENAIM TEXTURE lava rock
 |
| This is an easy texture because it is uniform. Use it on a photo you want some warmth (orange/red tones) and texture. |
ALLENAIM TEXTURE moon rocks
 |
| This is also an easy texture. Make sure to lower the opacity anywhere from 10% to 40% for a subtle texture, and you can raise it to create a more detailed texture. |
ALLENAIM TEXTURE ragged bleu
 |
| This is one of my favorites...the blue really looks beautiful on top of florals. Be careful of the lines that they don't cross your original photos in inappropriate places. |
ALLENAIM TEXTURE urbantrek
 |
| This texture is a little more complex to use die to the shadows and angle. Play around with a shot that doesn't have a lot of detail already to come up with a really cool look! |
Looking for a good beginner camera? I started out with the D40, then moved up to the D5000. The d5100 below is the newest version and is a great price right now! By clicking through to Sam's Club and purchasing any camera, you are supporting 'A Nest for All Seasons'. THANK YOU!
Hiç yorum yok:
Yorum Gönder